
The Re-Gel Field Guide
How to Restore & Protect Your Boat's Gelcoat
A complete, no-experience-needed walkthrough — from why your hull faded to bringing back a deep, lasting gloss in a single weekend.
If your hull has gone from glossy to a chalky, faded haze, this guide walks you through exactly how to bring it back — and keep it that way. No detailing background required, and no buffer, compounds, or special tools. We'll cover what's actually happening to your gelcoat, why the buffer isn't your friend long-term, and a start-to-finish restoration you can wipe on by hand in a single afternoon with Re-Gel.
📖 Jump to a section
Gelcoat & oxidation, explained
Gelcoat is the thick, pigmented outer layer sprayed onto fiberglass hulls at the factory. It's what gives a new boat that deep, wet shine — and it's the first thing to take a beating from sun and water. Think of it like the clear coat on a car: a sacrificial shield that slowly wears down over time.
What oxidation actually is. UV rays and saltwater attack the resin at the very top layer, leaving a dead, porous, powdery film. That roughness scatters light instead of reflecting it — which is why an oxidized hull looks flat and gray no matter how often you wash it. The chalk on your hand is the gelcoat literally shedding.
Here's the key thing most people miss: the color and gloss aren't gone. They're hiding under that dead layer. Restoration is about renewing that surface so the good gelcoat shows through again.
How bad is yours? The 10-second self-test
Wet a small patch with water — if it looks glossy while wet but hazy when dry, you've got oxidation. Match what you see to the scale below.
Light
Slight dullness and a small loss of shine, little to no chalk on your hand. Comes back easily.
Moderate
Noticeably faded, with visible chalk on your fingers plus water spots and light scuffs. The most common condition — a perfect Re-Gel candidate.
Heavy
Gray, powdery, patchy color and dock rash. No problem here — the more oxidized the gelcoat, the more dramatic the restoration.
Severe
Deep chalking and staining. Still restorable in most cases. The one real limit is gelcoat that's already been buffed down close to bare fiberglass — more on why that matters next.
The Re-Gel approach — why bonding beats buffing
For years, restoring a faded hull meant one of two things: wax or the buffer. Wax fills the dullness for a few washes and then rinses right off. Buffing and compounding go deeper — they grind the dead top layer of gelcoat away to reveal shinier gelcoat underneath. And here's the honest part: buffing does work. A good compounding pass can absolutely bring the gloss back.
But it comes with a catch. Your gelcoat is a thin layer to begin with, and every buff grinds a little more of it away. Do it season after season and you eventually cut clean through to raw fiberglass — and once you're at bare glass, no polish fixes it; you're into repainting or re-gelcoating. You only get so many passes before you hit fiberglass.
Re-Gel takes the opposite path. Instead of grinding gelcoat off, our two-part urethane wipes on by hand and bonds into the gelcoat at the molecular level — restoring the fiberglass instead of just covering it. Nothing gets ground away, nothing washes off. No buffer, no compounds, no painting.
Buffing has a hard limit
Compounding restores shine by removing gelcoat. Since that layer is thin and doesn't grow back, there's only a finite number of times you can do it before you reach bare fiberglass. Re-Gel adds a finish instead of subtracting gelcoat — so restoring your boat doesn't cost you gelcoat you can never get back.
How it stacks up
| Re-Gel | Wax / Polish | Buffing / Compound | Repaint | |
|---|---|---|---|---|
| Brings back real gloss | ✓ | Temporary | ✓ | ✓ |
| Without grinding gelcoat away | ✓ | ✓ | ✗ | ✗ |
| Lasting UV-stable finish | ✓ Years | Weeks | Months | Years |
| No buffer or tools needed | ✓ Wipe-on | ✓ | ✗ | ✗ |
| Typical cost | $270–$690 | $20–$60 | Varies | $5,000–$50,000 |
What you'll need (spoiler: almost nothing)
This is the best part. Because Re-Gel wipes on by hand, there's no buffer, no polisher, no pads, and no compounds to buy. If you can wash and wax a boat, you can apply it. Your kit already includes the essentials below — you really just supply water, a little shade, and an afternoon.
🧴
Re-Gel + catalyst
The two-part urethane that does the work, sized to your boat. You combine the two right before applying.
🧽
Included soap & Scotch-Brite pad
In the kit. For the initial wash that lifts dirt, salt and loose oxidation off the surface.
🧼
Included Wax & Grease Remover
Also in the kit. Wipes the surface truly clean so Re-Gel bonds to bare gelcoat.
⬜
Applicator
Everything you need to wipe on a smooth, even coat Included.
💧
A hose & water
For the wash-down. About the only thing you supply yourself.
⛅
Shade & a dry day
Work out of direct sun on a dry surface. No special workspace or equipment required.
No buffer. No compounds. No sanding.
There's light sanding, no buffing, and no spraying involved at any step — and nothing to buff off afterward. Re-Gel is engineered for DIY use from start to finish.
Not sure which kit size?
Mini Kit covers boats up to 20 ft and RVs up to 30 ft. Standard Kit covers 20–30 ft boats and RVs up to 40 ft. Pro Kit covers up to 1,200 sq ft (larger boats and RVs). Ultra Kit covers up to 1,600 sq ft for the biggest projects. There's also a Re-Gel Gelcoat Refill if you already have a kit and need more product.
Prepping the surface
Restoration lives or dies on prep. Re-Gel bonds to clean, bare gelcoat — so a good wash and wipe-down is what makes the finish grab and last. The kit includes everything you need for this part.
1
Wash with the included soap & Scotch-Brite pad
Wash the whole surface with the included soap and Scotch-Brite pad. This lifts off dirt, salt and loose oxidation so you're working on a clean base. Rinse it down.
2
Wipe down with the included Wax & Grease Remover
Wipe the whole surface with the included Wax & Grease Remover. This strips away any old wax, grease or polish so Re-Gel bonds directly to the gelcoat.
3
Let it dry completely
Re-Gel goes onto a clean, dry surface. Let everything dry fully — and if you like, tape off rub rails, decals and waterline stripes to keep your edges crisp.
Restoring the gelcoat
This is the easy part. Re-Gel goes on by hand in a thin, even coat — no machine, no pressure, and nothing to buff off afterward. Work in shade on a dry surface, one manageable section at a time, and let the product do the work.
1
Combine the catalyst with the Re-Gel
Combine the catalyst with the Re-Gel bottle right before you apply. Only activate what you'll use in the next stretch — once mixed, it has a working window, so don't over-pour.
2
Load your applicator
Apply a generous, even amount of activated Re-Gel to the pad. Re-Gel self-levels, so a fuller coat lays down smoother than a skimpy one — just keep it even, not pooling in one spot.
3
Wipe on a smooth, even coat
Wipe the product on in a smooth, even coat, working slowly and section by section. Lay it on fuller rather than sparse — it self-levels as it cures — and you'll watch the chalky haze disappear into a deep, wet gloss.
4
Leave it alone to cure
That's it — no buffing, no wiping off. It's dry to the touch in about an hour (around 70°F) and reaches full cure in about 4 days. Keep it out of the water until fully cured.
Badly oxidized? Even better.
Re-Gel is built for heavy oxidation — the more chalked the gelcoat, the more dramatic the change. For the deepest cases you can lay down a second coat once the first has set. Always do a small test spot in a hidden area first. No buffing or sanding required at any point.
The finish is the protection
Here's the relief: with Re-Gel, you're not racing to wax over your work before the shine dies. Because Re-Gel bonds into the gelcoat and cures to a hard, UV-stable surface, the finish is the protection — and it holds its own gloss for years with basic care, not weeks like wax.
If you want an extra bit of slickness and water beading on top, a quick wipe-on wax is completely optional — a nice-to-have, never a requirement to keep your results.
Just keep it clean
Honestly, the best maintenance is a gentle regular wash. That alone keeps a Re-Gel finish looking sharp season after season.
Everyday maintenance
The finish you just worked for is easy to keep — as long as you wash it the right way. The wrong soap can strip protection in a single cleaning.
Watch your soap
Harsh, high-pH detergents (including a lot of dish soaps) strip protective layers fast. Marketing words like biodegradable, eco-friendly, gentle or safe do NOT mean pH-neutral. Use a dedicated marine wash designed to clean without stripping.
Troubleshooting
If something looks off, it's almost always technique — not the product. Here are the fixes for the issues we hear about most.
I see streaks or lines in the finish
This usually comes down to one of two things. Most often it's too little product or working it too thin — Re-Gel self-levels as it sets, so a fuller, even coat actually lays down smoother than a skimpy one. Keep your motion smooth and don't be shy with the product. Streaking can also show up when the sun has really beaten the gelcoat down; when a boat is that far gone, lay on a slightly heavier coat and add a second once the first sets, and it evens right out.
A spot looks dull or I missed a patch
No problem — just apply another coat over it. Make sure the area was clean and dry first. ONLY DO AFTER 24 HOURS
The product is setting up too fast
Heat is the culprit. Move to a cooler, shaded surface, work smaller sections, and only combine what you'll use in the next few minutes.
There's still heavy chalk after one coat
That just means the oxidation was heavy. Let the first coat set, then lay down a second. No buffing needed.
The finish still feels tacky
Give it time — dry to the touch in about an hour, full cure in about 4 days. Cold or humid conditions slow it, and correct catalyst mixing matters.
I got product on trim or decals
Wipe it off promptly before it cures. Once it sets it bonds hard, so masking off edges beforehand is easy insurance.
Pre-start checklist
Run through this before you open the kit and the whole job goes smoother:
- Surface is washed with the included soap & Scotch-Brite pad, and fully dry
- Wiped down with the included Wax & Grease Remover
- Working in shade, on a dry surface, out of direct sun
- Catalyst ready to combine right before you apply
- Applicator and gloves on hand (trim masked off if you like crisp edges)
- Test spot done, and kit sized for the whole job
Frequently asked questions
Do I need a buffer or special tools?
No. Re-Gel wipes on by hand — no buffer, no compounds, no sanding, no spraying. If you can wash and wax a boat, you can apply it.
Isn't buffing good enough on its own?
Buffing can restore shine, but it does it by grinding gelcoat away — and that layer is thin and doesn't grow back. Do it enough times and you reach bare fiberglass. Re-Gel restores without removing any gelcoat.
How long does it take to dry and cure?
Dry to the touch within about an hour (around 70°F, low humidity), and full chemical cure in about 4 days. Keep it out of the water until fully cured.
How long will the finish last?
Because Re-Gel bonds into the gelcoat rather than sitting on top like wax, it can last years with proper care — depending on use, climate and sun exposure.
Will it work on severe oxidation?
Yes — that's exactly what it's built for. The more oxidized the gelcoat, the more dramatic the restoration. For the heaviest cases, a second coat gets you there.
Can I use it on more than just the hull?
Re-Gel is built for fiberglass gelcoat and is also safe on most 2-part painted surfaces. Always test a hidden spot first.
Which kit should I buy?
Size by boat length: Mini (up to 20 ft), Standard (20–30 ft), Pro and Ultra for larger hulls. When in doubt, size up.
Get everything you need in one kit
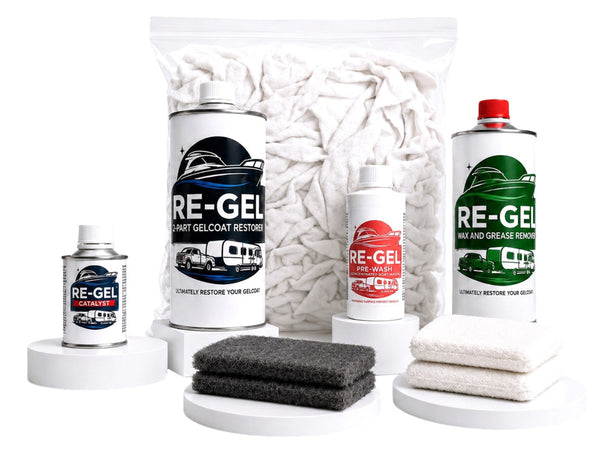
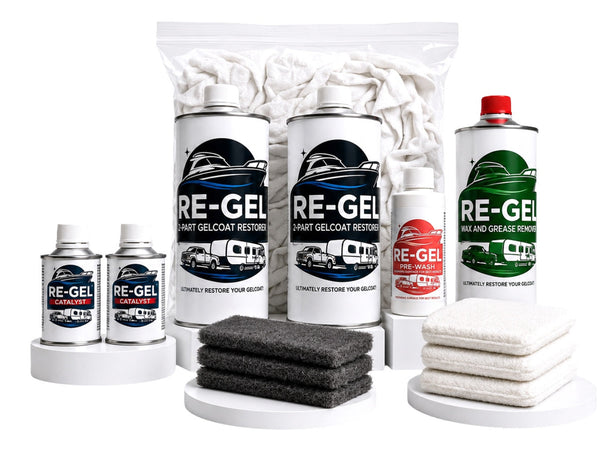
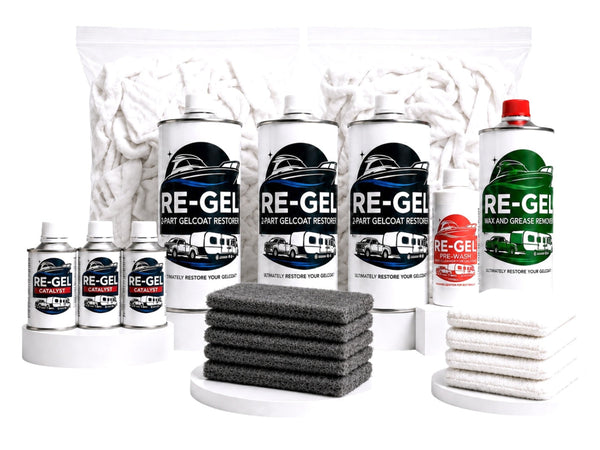

RestoreBring the true color back up through the chalky, faded layer.
BondSeal it in at the molecular level — not a wax that washes off.
ProtectKeep the gloss with simple, gentle upkeep.
Ready to bring your gelcoat back?
Pick your kit size, follow this guide, and give your boat the deep, lasting shine it had the day you bought it.
Shop Re-Gel Kits